- Installing the Main Game
- Step 1: Create a TAKP Forum Account
- Step 2: Download the Game Client
- Step 3: Converting your TAKP client to Quarm
- Step 4: Installing Zeal 1. Prerequisite 1. (Required) Enable sound in your eqclient.ini 1. Prerequisite 2. (Required) Excluding your TAKP Installation 1. Why is Zeal getting flagged as a Virus/Malware? 1. Download and Extract Zeal.asi to your TAKP Folder 1. UI Files for Zeal 1. Verify Zeal Installation 1. Zeal Crash Reports
- Step 5: dgVoodoo2
- Step 6: Issues Running the Game 1. Set Compatibility
- Step 7: Launch the game
Installing the Main Game
Important Backup Reminder
Whenever you make changes or overwrite files, it’s crucial to create backups to prevent data loss. We strongly recommend backing up the entire TAKP folder or any modified files before proceeding with any alterations. Creating backups is a quick and easy process that can save you from potential headaches down the line. While we won’t remind you to back up files after every step, it’s a best practice to develop a habit of regularly backing up your data.
Step 1: Create a TAKP Forum Account
Before you can download and install the game, you’ll need to create an account on the TAKP forums.
*NOTE: You must only create 1 forum account. You can create up to 10 game accounts under your forum account, but you must not create more than 1 forum account. If this is detected, the extra forum accounts will be deleted, and access to any game accounts associated with them will be lost. Also, please name your forum and game accounts carefully as these cannot be changed or deleted after creation. Read the forum FAQ and Rules for more information here.
-
Visit the following link and follow the instructions to register a new account: Login
-
Once you have created a forum account and are logged in, navigate to the “Game Accounts” section.
-
Click “Create Login Server Account” and create a game account.
Step 2: Download the Game Client
- Visit the Getting Started page on the TAKP wiki Getting Started
- Follow the instructions in the “Getting Started with Windows” section to locate and download the recommended game client.
- Once you have the client files, unzip them into their own folder on the root of your C drive (or other drive letter), do not put this under the \Program Files or \Program Files (x86) folders.
Step 3: Converting your TAKP client to Quarm
- Join the Project Quarm Discord.
- Navigate to the #server-files channel.
- Download the latest game patch files from #server-files.
- Extract the downloaded Patch-M-DD-YYYY-V.zip file into your TAKP folder.
Note: As of February 2025, game updates will be delivered through the #server-files channel on the Project Quarm discord. Make sure to check this channel periodically for the latest updates.
Step 4: Installing Zeal 
Zeal is used to add additional functionality to EverQuest. Main additions include 3rd person camera smoothing fix, better tab targeting, spell sets, and melody. A full list of features can be found in the readme. The readme is based on latest commits not the latest release build.
Prerequisite 1. (Required) Enable sound in your eqclient.ini
Make sure Sound=TRUE is listed in your eqclient.ini. Zeal uses the EverQuest sound engine to inject code into the game, thus the sound must be enabled for Zeal to function. You will still have access to various sound options in game by pressing ALT + O and adjusting the sliders for Sound Realism, Music Volume, and Sound Volume.
Prerequisite 2. (Required) Excluding your TAKP Installation
Excluding your TAKP installation from being scanned by your antivirus software can also help reduce load times, zoning times, and eliminate stuttering when opening your bags. This is highly recommended and is a prerequisite for downloading Zeal, as explained below.
There are two methods to exclude your TAKP installation, manually or using a Powershell command.
Windows 10
Instructions for performing the above through Windows Settings panel:
This may be slightly different for the different versions of Windows 10. This was taken from the 1909 version released late 2019.
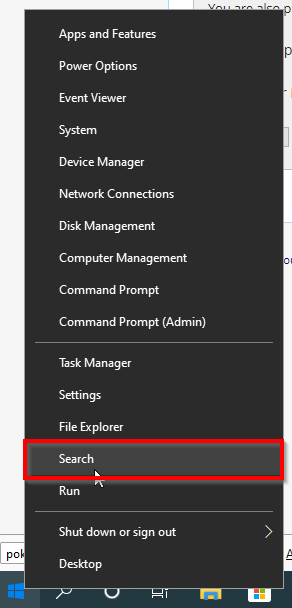
-Right click the windows button in the lower left hand corner and select search.
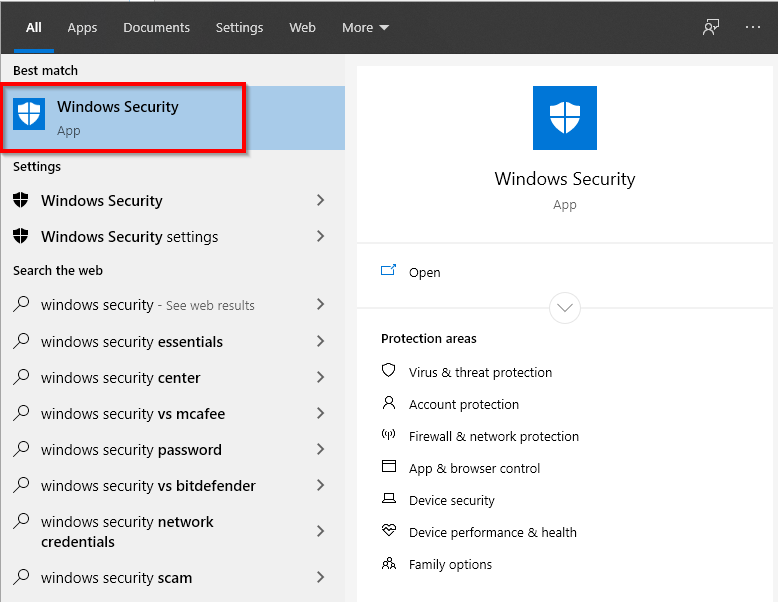
- Search for and select Windows Security.
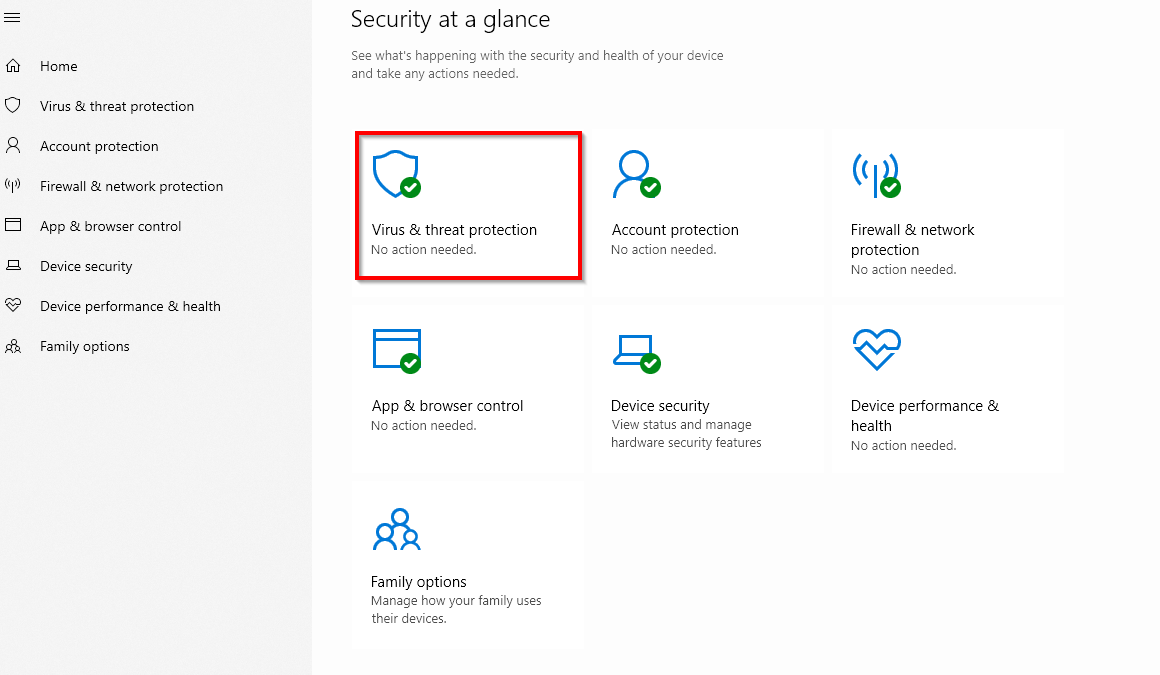
- Click Virus and Threat Protection.
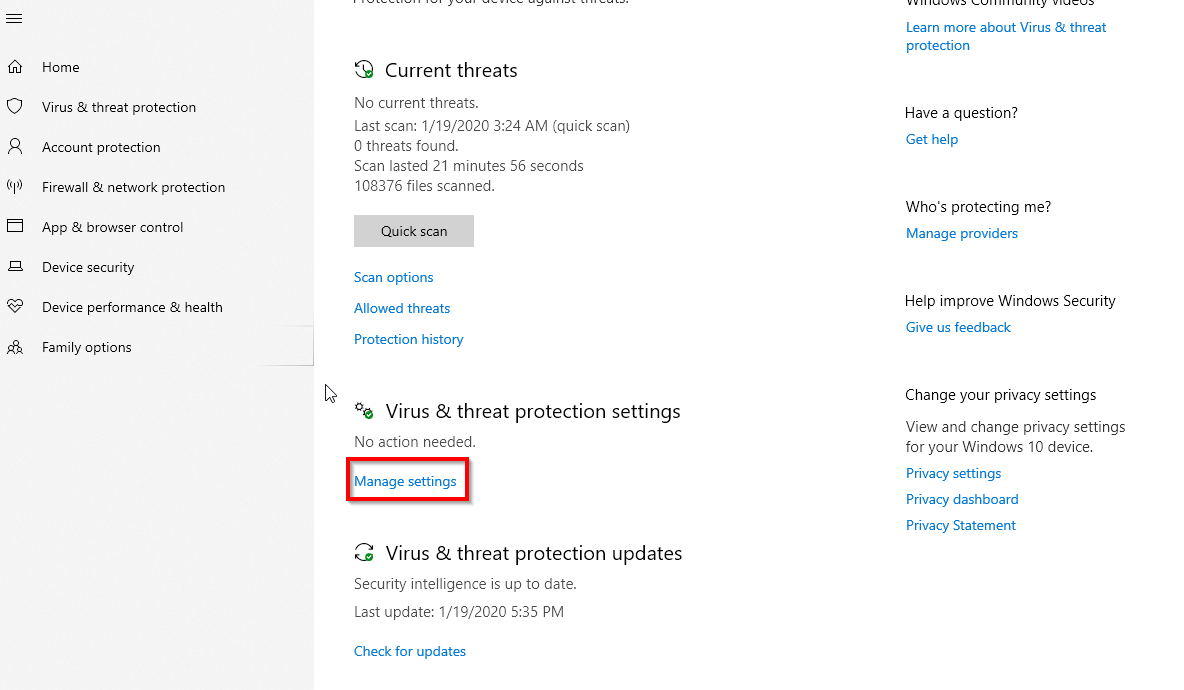
- Under Virus and Threat Protection settings, click manage settings.
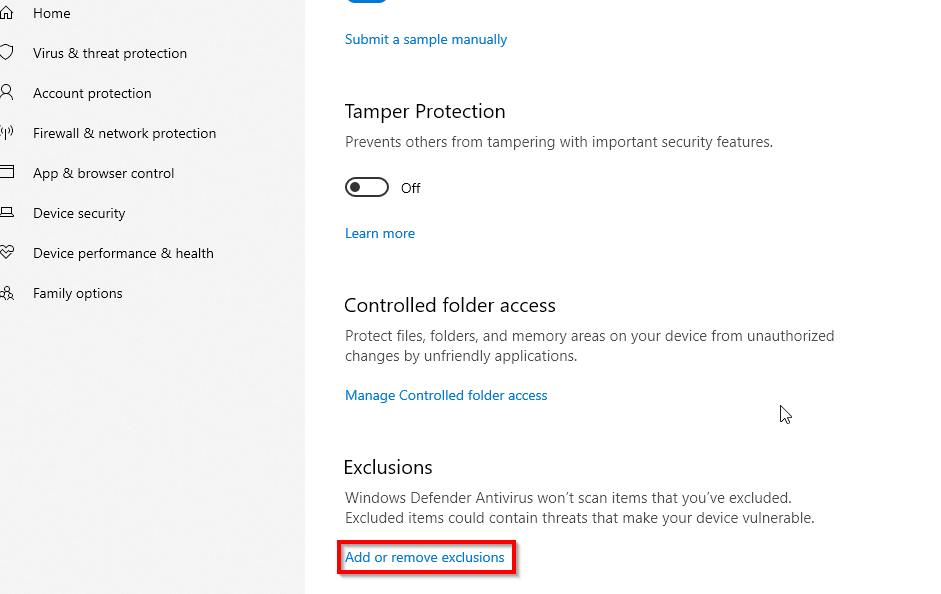
- Under exclusions, click Add or Remove Exclusions.
- Click Add an exclusion and select Folder.
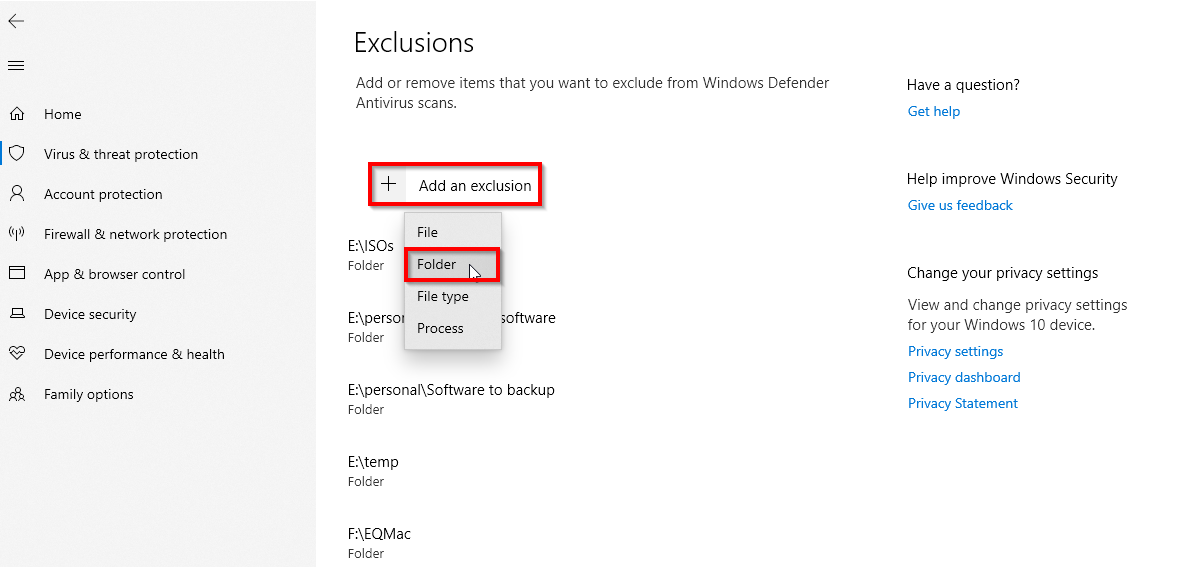
- Select the folder that you currently have (or intend to have) the TAKP files extracted into and run from when you play.
Powershell
(Optional Method)
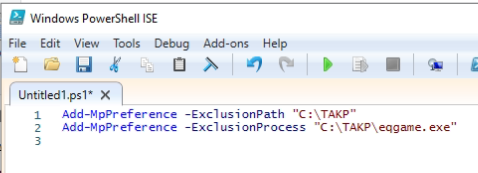
Open administrative PowerShell and type in the below, replace the C:\TAKPv22 folder path with where you unzipped the game files.
Add-MpPreference -ExclusionPath "C:\TAKPv22"
Add-MpPreference -ExclusionProcess "C:\TAKPv22\eqgame.exe"
Why is Zeal getting flagged as a Virus/Malware?
Zeal is a file that adds new features and improvements to EverQuest by injecting custom code into the game’s sound engine. This process is called code injection. While code injection is sometimes associated with malware or viruses because it modifies the game files, Zeal serves a legitimate purpose in enhancing the gaming experience.
However, because Zeal is currently in early development and does not have a digital signature, it may be flagged as potentially harmful by antivirus software. A digital signature is a way to verify that a file is safe and comes from a trusted source. Since Zeal does not have this signature yet, antivirus programs treat it with suspicion.
The Project Quarm team plans to address this issue by obtaining a digital certificate from Microsoft to sign Zeal in the future. This digital signature will confirm that Zeal is a legitimate and safe program, eliminating any concerns about its legitimacy.
Download and Extract Zeal.asi to your TAKP Folder
- To download Zeal, visit the project’s GitHub repository at and navigate to the ‘Releases’ section. You’ll find the latest version available for download in a file named
zeal.zip. Ensure that you have previously excluded your TAKP folder from virus scans, as discussed in the previous step. Click on Assets to expand and reveal the files underneath. Right click thezeal.v#####.ziplink and select Save Link As…, and save the file to your TAKP folder. - If you encounter any difficulties downloading the file, consider using an alternative browser such as Edge or Firefox. Alternatively, if you’re using Chrome and experiencing issues, you may need to force the download by following the instructions here.
- Once downloaded, extract the contents of the zip file directly into the root directory of your TAKP folder. Make sure you see
zeal.asiandzeal.pdbin your TAKP folder and if you encounter any trouble, your first step is to make surezeal.asiis still in your TAKP folder.
UI Files for Zeal
Additionally, Zeal includes several other UI files that enhance its functionality. These are contained within the \uifiles\zeal\ folder. This is acts like your default UI files and will be included in your UI regardless of which UI folder you’re using. It is a good idea to verify that the \uifiles\zeal\ folder contains the following files:
targetringsfolderEQUI.xmlEQUI_GuildManagementWnd.xmlEQUI_OptionsWindow.xmlEQUI_ZealOptions.xml
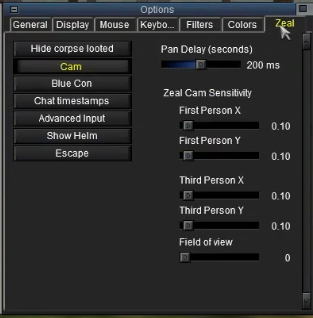
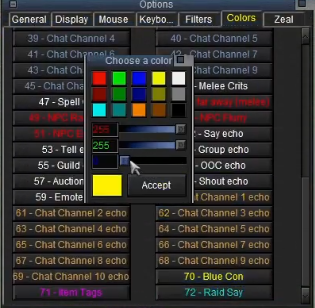
When in game, you can press ALT + O to view the options menu and look for new tabs related to Zeal:
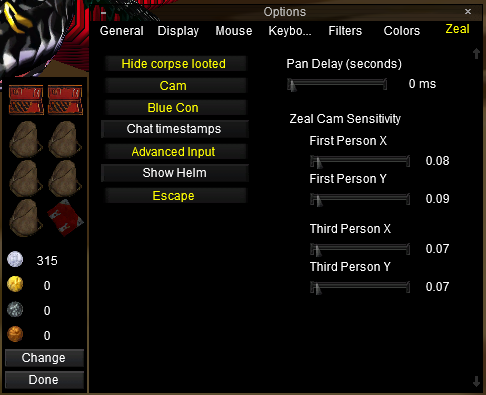
However Zeal does not come with user interface files for every Zeal feature and your game chat window will show errors when playing. These are not harmful to your gameplay experience and can be ignored. EverQuest will identify which files are missing or broken and attempt to load them from the default folder instead.
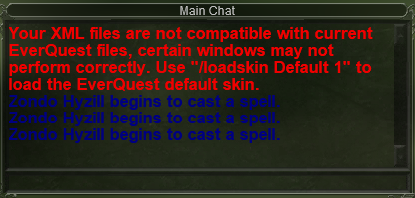
There are several EQ User Interfaces that have been modified to work with Project Quarm and Zeal. A list of these can be found down under Where to get Quarm User Interfaces. If you are looking for something simple and quick to get started with, I have compressed a more complete collection of duxaUI files, the default UI for Quarm/TAKP clients, found here.
If you are already using a custom user interface, you can determine which UI elements are missing Zeal features and causing errors by analyzing the UIErrors.txt file found within the root of your TAKP folder. An easy fix is to download another UI that has everything working such as qqui Calmethar, and just move the files you need into the UI folder you are using. Most user interfaces can be pieced together from different sources to achieve the look and feel you prefer.
If you choose to download and install a new user interface, make sure you add the folders and files at the top of this step to your new UI folder.
Verify Zeal Installation
To verify that Zeal has been installed correctly, follow these steps:
- Log into the game and type
/zeal versionto check the version number. - Use
/help zealto see the list of available commands. - Open the Options window in-game (usually by pressing ‘ALT + O’ or clicking the Options button from the window selector).
- Look for new tabs or settings related to Zeal features, such as the “Zeal”, “Cam” or “FPS Limit”.
If you see these new options, it further confirms that Zeal is working correctly.
Zeal Crash Reports
In the event that your game crashes while using Zeal, a folder named /crashes/ will be automatically created in the root directory of your TAKP installation folder. This folder will contain crash reports in a format similar to 2024-06-28_08-54-56.zip.
To help the development team diagnose and resolve the issue, you can upload these crash reports to the official Discord channel #zeal-discussions. The team will review the reports and work towards identifying the cause of the crashes, providing the community with potential solutions.
Step 5: dgVoodoo2
dgVoodoo2 is a set of implementations of old graphics APIs for Windows 7 and later versions. If you are still having problems with intermittent game crashes, this may help.
- Download the latest version here. Open the zip file and extract only dgVoodooCpl.exe to the root of your TAKP folder.
-
For Windows, inside the zip file, under /MS/x86/ copy all four .dll files to the root of your TAKP folder, overwriting any older files found.
D3D8.dllD3D9.dllD3Dlmm.dllDDraw.dll - Run dgVoodoo.conf from within your TAKP folder.
- Press the “./” in the upper right to select your TAKP folder.
- Under Adapters, make sure your primary video card is selected.
- Select “Windowed Mode”.
- Navigate to the DirectX tab.
- Change VRAM to match your video card’s VRAM.
- Uncheck dgVooDoo watermark.
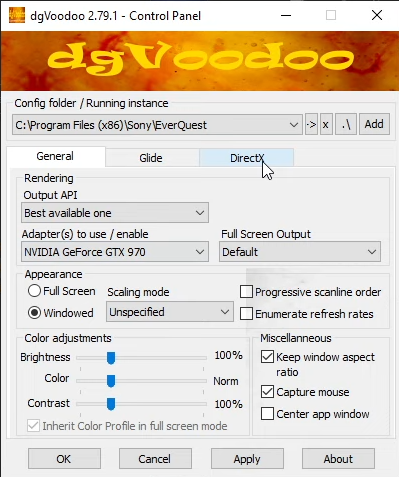
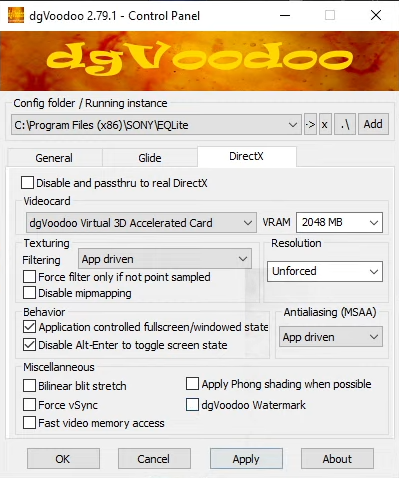
Source: El Hefe
Step 6: Issues Running the Game
If you see any of these when trying to first run the game:
- windows application error
- the memory could not be read
This could be caused by WinEQ2 running in the background which is not compatible with this client. Exit the WinEQ2 application and try again.
It could also be caused when Directx 9c or a Visual C runtime is not installed. Try installing the following, rebooting and trying again:
- Visual C 2015 runtime - download the 32bit version
- Directx 9c
- Could also be that proper antivirus exclusions are not set.
Set Compatibility
Navigate to your TAKP folder and find eqgame.exe. Right click and select Properties.
Under Compatibility, select “Run this program in compatibility mode for Windows XP (Service Pack 2)”.
Step 7: Launch the game
Run the eqgame.exe to launch the game. Click through the next few pages. You can choose to click on or off the luclin models here which is easier than changing it in your eqclient.ini. I do not recommend changing anything on the final screen though.
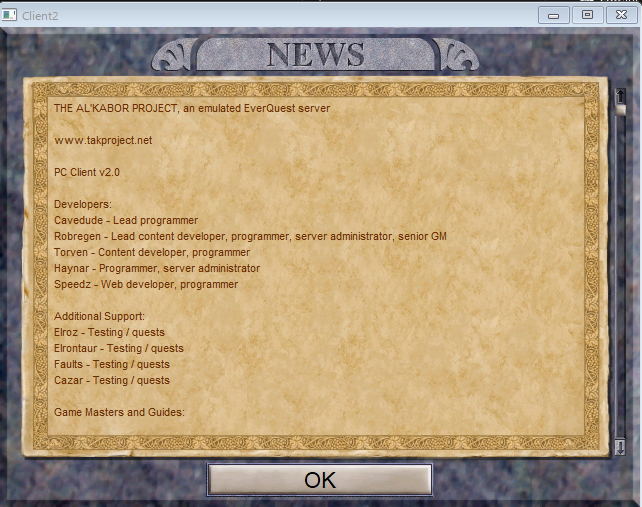
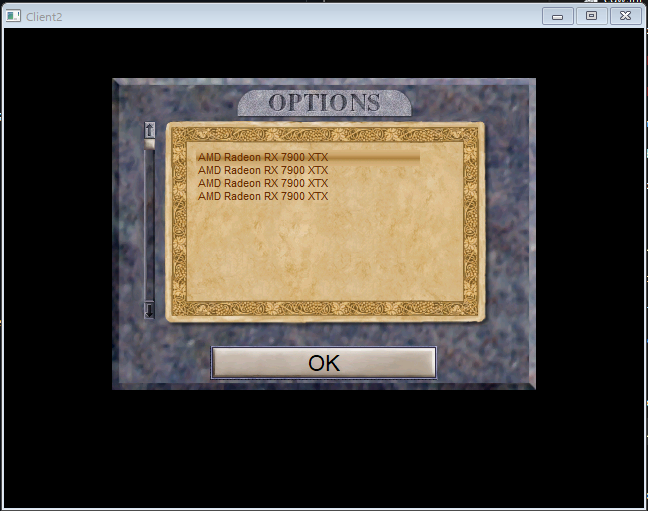
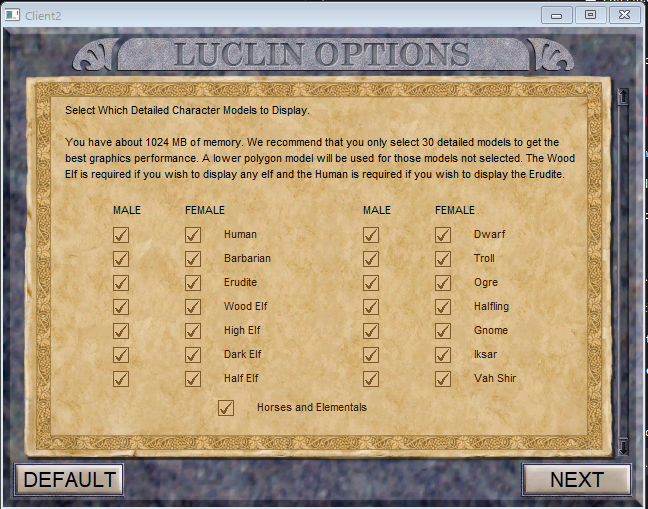
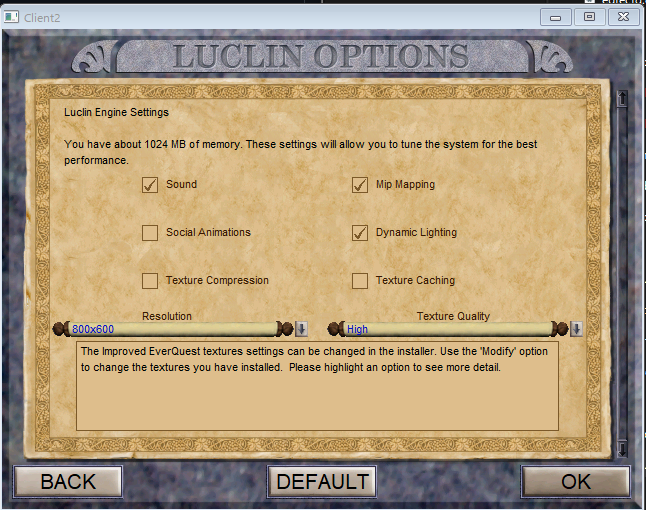
Once you are at the login screen, exit back out of the game and close it. In your TAKP folder, open your eqclient.ini and change the following settings.
- AttackOnAssist=FALSE (Optional, but Recommended)
- CombatMusic=FALSE (Unless you prefer immersion)
- EnableExtendedNameplateDistance=TRUE (Mandatory to see nameplates further than you can throw)
- [VideoMode]
- Width=1920
- Height=1080
- [Options]
- MaxBGFPS=60
- NoFPSLimiter=0 - This option will only work with the very latest experimental .dll and this is half the fix for the 3rd person stutters you previously experienced in older versions of Quarm. SET TO 0
You can now run eqgame.exe again and log into the game. Once you log into your character, you will be looking at the default “NewUI”. Press ALT + O to open the options menu. Navigate to General and select Load UI Skin. Select duxaUI for now and click Load Skin. This will allow you to open options again with ALT + O and modify the new Zeal settings as well.
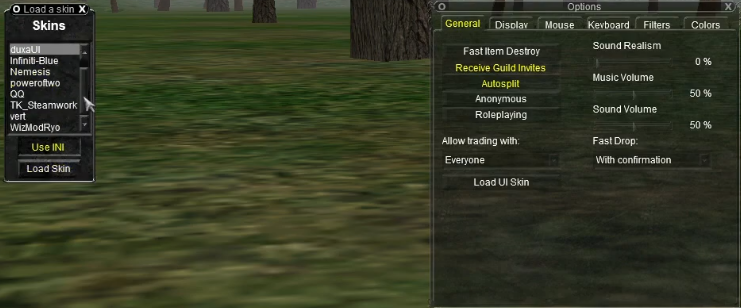
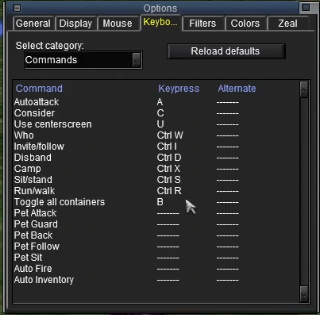
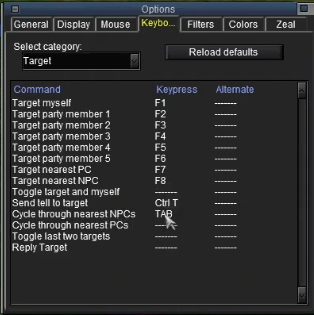
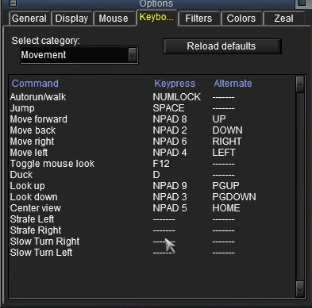
Below are some recommended Zeal specific changes you should consider before you start your adventure.
This concludes the Installing the Game article. Please proceed to After Installing the Game.
 Quarm.Guide